
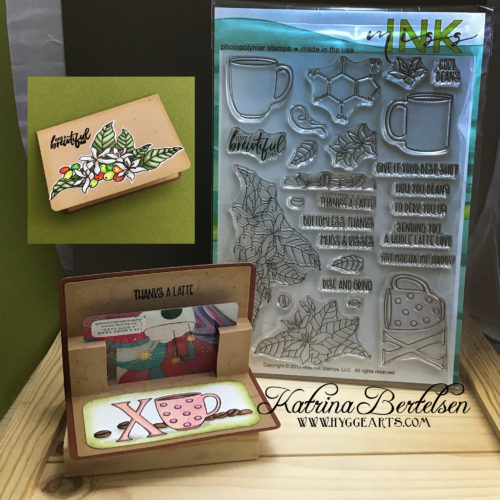
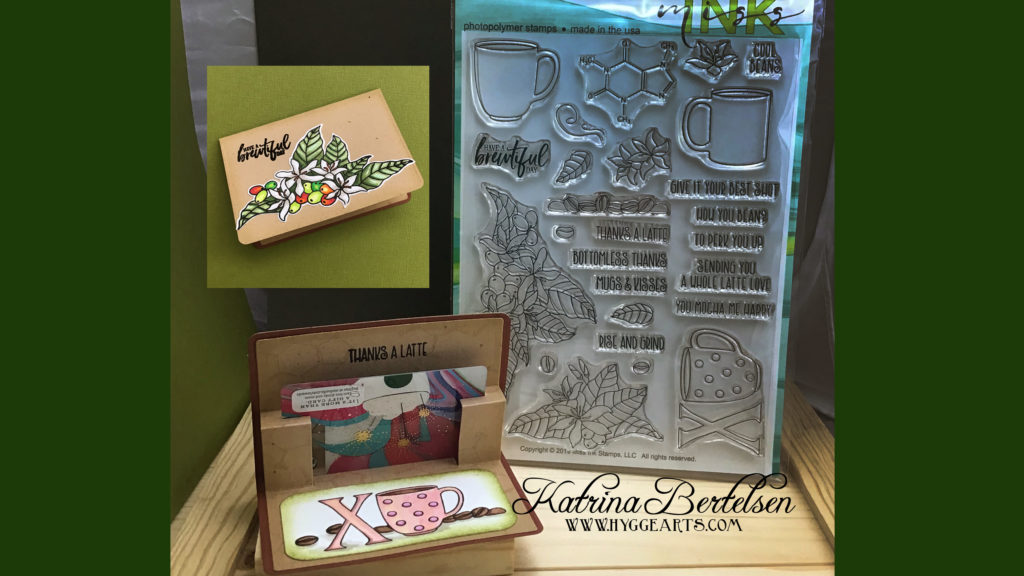
I recently came upon a new online stamp company called Miss Ink Stamps! And OH BOY what cute stamps they have! I immediately had to place an order for one of their coffee-related stamp sets called Brewtiful!
I also currently had a Sizzix die by Lynda Kanase for a Gift Card Holder Pop-up. What a perfect combination to use her die along with this coffee set to give to someone a big thank you gift!
Below you’ll find a step by step image on how I made this Brewtiful Gift Card Holder along with a written tutorial on how it was done.
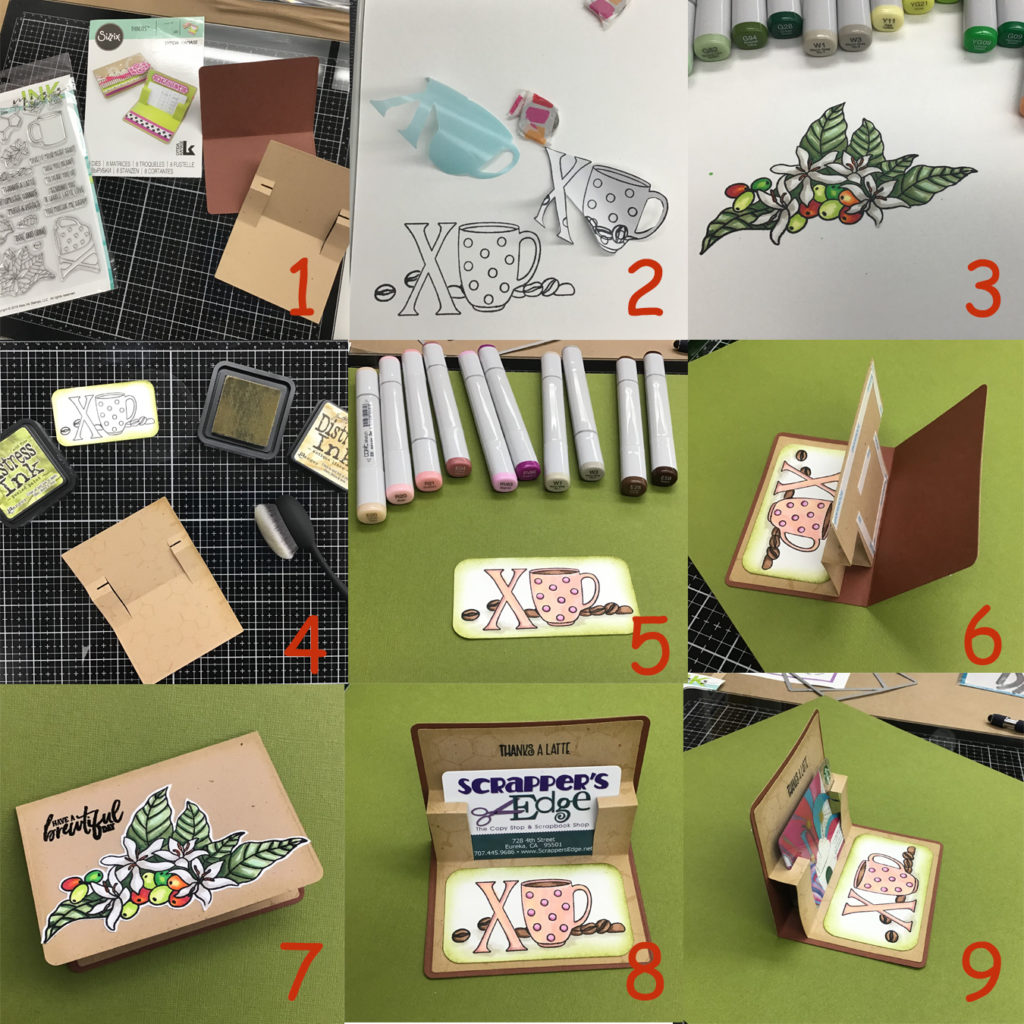
Step 1: First I gathered both my new set from Miss Ink Stamps and my gift card holder pop up die. I ran the two larger pieces in the die set through my Big Shot die cutter in contrasting colors. (The die set also includes a few decorator pieces I chose not to use for this project).
Step 2: I stamped out the XO stamp onto Smooth Bristol Cardstock using my Black Memento Stamp Pad since I was going to be coloring my image with my Copic markers. I also wanted to add the coffee bean stamps so I needed to mask off the XO stamp. I used the Stamping Mask Paper by Inkadinkado to create a mask that can be reused several times by keeping the backing paper.
Step 3: I stamped the larger coffee bean plant image again on Smooth Bristol Cardstock using the Black Memento Stamp Pad. I used several different Copic Markers as seen in the photo to color in the image. I based the coloring off of an image I found on Google search.
Step 4: Next I used my blender brush to apply Distress Ink to the edges of my card and XO add on piece; just to give it a little dimension and not seem so flat.
Step 5: I then took the XO add on piece and colored it using my Copics as well.
Step 6: Now it was time to assemble the die cut piece to the backing piece. Taking note not to put adhesive on the pop out portion, I used my Scor Tape to adhere the bottom of the die cut first. By leaving the tape backing on the upper portion, it was easy to line up the lower portion to the crease in the card without the upper section sticking too soon. Once the lower portion was secure, I removed the backing and gently closed the gift card holder card to securely adhere the top portion. Then I test the pop up mechanism to make sure it functioned properly.
Step 7: Once I had the functioning card done, I adhered my colored coffee plant image to the front of the card. I also used a sentiment from the stamp set and embossed it using black embossing powder.
Step 8 & 9: Then it was time to insert a gift card and show off the newly finished project! I was working on this project at a local Scrapbooking Shop ( Scrapper’s Edge) Weekend Crop, so of course, I needed to display their card in it first! Then of course putting a Coffee Shop gift card in just made sense!
I hope you all enjoyed this project as much as I did! Please leave comments and give me feedback on if my tutorial was helpful. Thank you and Enjoy!